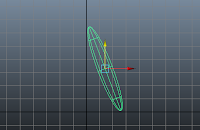
Screenshot 1 - Creating the legs

This image shows the first step, creating the leg required to build a character. I used the front view panel to line it up with precision.
Screenshot 2 - Duplicating the legs
This screenshot shows the duplicated leg, created by using the duplicate special tool within the edit list.
Screenshot 3 - Grouping
This image shows the group tool I used in order to group the 2 legs together, found in the edit list.
Screenshot 4 - Character shape
This screenshot shows the current stage, after each sphere had been created and duplicated where necessary. With the base compeleted, the next stage is to create joints.
Screenshot 5 - Spine
This screenshot shows the use of the Joint Tool. Here, I have used said tool to create the spine, and I will later create joints at all relevant places of the body, including the arms, legs and head.
Screenshot 6 - Mirror Joints
This screenshot shows the next step, which was to mirror one half of the joints created. This saves time and ensures symmetry within the body.
Screenshot 7 - IK Handle Tool
 This screenshot shows the next step, the IK tool. This is used to allow handles to be created, allowing the recently created joints to be moved. These handles can also be limited, to prevent a joint from being moved too far in a certain direction.
Screenshot 8 - Binding Skin
This screenshot shows the Bind Skin feature, which helps prevent unwanted movement from other joints during animation.
Screenshot 9 - Bending Limbs

Finally, using the requried CV's, I created bends within limbs in an attempt to show more reality.


No comments:
Post a Comment