Tuesday 8 November 2011

Mouse Character

These images show my most recent mouse character. Here, I have rounded off the head and body, by using various tools/techniques.


Monday 7 November 2011

Current Situation - Mouse Character

Just a post to show my current mouse character. Here, I have modelled the body and head, following my images as reference within Maya 2012. As you can see, it is currently still rather cubish/boxy; this is due to the cube I started with.


The standalone head is as it appears without the smooth function. My next task is to make the model seem a lot smoother, removing the cubish design.

Character Design

I have decided to create a bipedal mouse as my character. I have decided on this as I believe it will be fun to create, and will allow me to include a simple but effective objective - reach the cheese. The mouse will walk on two legs, rather than four.

Mouse Design 1

This image shows my first design. Its rather simple, but gets the point across to the audience. This is the front view of what might be my final character design. Its fur will be of a grey colour.


This image shows the side view of the first design.


 Mouse Design 2

This is the front view of my second idea for the mouse character. This design is based on cyborgs/droids. The right eye will be a glowing red, the patches on the arms and legs will show a glowing green.

The body itself will be of metal, with exception of the black patches, which will be cloth. Of course, with this design, the cheese will also be made of metal.

This character will use its thrusters (located in boots) to reach the first counter, rather than climbing a cable.

Storyboard

Frame 1

This image shows the first frame within my animation. It shows the core environment for this particular task, a kitchen. Here, the camera will perform a quick sweep of the kitchen.


Frame 2

This image shows the second frame. Here, the camera will zoom in on the door, where the main character, a mouse, will open the door slightly, and peek through the gap.


Frame 3

This image shows the third frame. Here, the mouse has climbed upon the counter by climbing up the dangling plug and cord, from the microwave.


Frame 4

This image shows frame four. Here, a fruit (probably an apple) will fall from the fruit browl, and land behind the mouse as he walks past it, narrowly missing him. For humour, I may also add a face to the fruit.


Frame 5

This is frame 5. Here, the washing machine will show fluid effects, by slowly filling up with water. Also, the mouse will be shaken as it walks across the shaking washing machine.


Frame 6

This image shows frame 6. Here, the mouse will cross the sink, filled with water (again, fluid effects). I may include a sponge for the mouse to ride on, in order to cross the sink. The taps will be on too, showing more water effects.


Frame 7

This image shows frame 7, where the mouse reaches the oven. The mouse catches fire as he walks over the hob, and leaps into the air, showing pain (emotion).If possible, the oven window will glow red, just for extra effect.


Frame 8

This image shows the final frame, frame 8. Here, the mouse has landed from the fire incident, right next to the cheese he has been longing for. The mouse then cheers, showing happiness (emotion). The camera slowly zooms and pans out, ending the animation.


Thanks for reading, any comments/feedback is much appreciated :)

Tuesday 1 November 2011

Rigging a basic character

In this scenario, I created a character using basic NURBS spheres and created a skeleton to allow rigging. This was part of a lesson-based tutorial performed by Sonia DiGennario. Below are screenshots showing each step:


 Screenshot 1 - Creating the legs


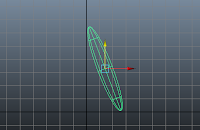
This image shows the first step, creating the leg required to build a character. I used the front view panel to line it up with precision.


Screenshot 2 - Duplicating the legs

This screenshot shows the duplicated leg, created by using the duplicate special tool within the edit list.


Screenshot 3 - Grouping

This image shows the group tool I used in order to group the 2 legs together, found in the edit list.


Screenshot 4 - Character shape


This screenshot shows the current stage, after each sphere had been created and duplicated where necessary. With the base compeleted, the next stage is to create joints.


Screenshot 5 - Spine

 This screenshot shows the use of the Joint Tool. Here, I have used said tool to create the spine, and I will later create joints at all relevant places of the body, including the arms, legs and head.


Screenshot 6 - Mirror Joints

This screenshot shows the next step, which was to mirror one half of the joints created. This saves time and ensures symmetry within the body.


Screenshot 7 - IK Handle Tool

This screenshot shows the next step, the IK tool. This is used to allow handles to be created, allowing the recently created joints to be moved. These handles can also be limited, to prevent a joint from being moved too far in a certain direction.


Screenshot 8 - Binding Skin

This screenshot shows the Bind Skin feature, which helps prevent unwanted movement from other joints during animation.


Screenshot 9 - Bending Limbs


Finally, using the requried CV's, I created bends within limbs in an attempt to show more reality.